Monday, October 20, 2014

How-To....... Clean a Pepper for Chopping or Stuffing


I found these gorgeous red peppers at the store. I can't remember the last time I saw peppers this gorgeous with these beautiful fresh green stems. I decided I will make stuffed peepers with these (see So Stuffed.....Peppers recipe).

You can use this same technique for pastilla peppers; pictured below (see So Stuffed.....Peppers recipe).


I clean them with a commercial veggies wash but just washing them in the sink with water is fine too.


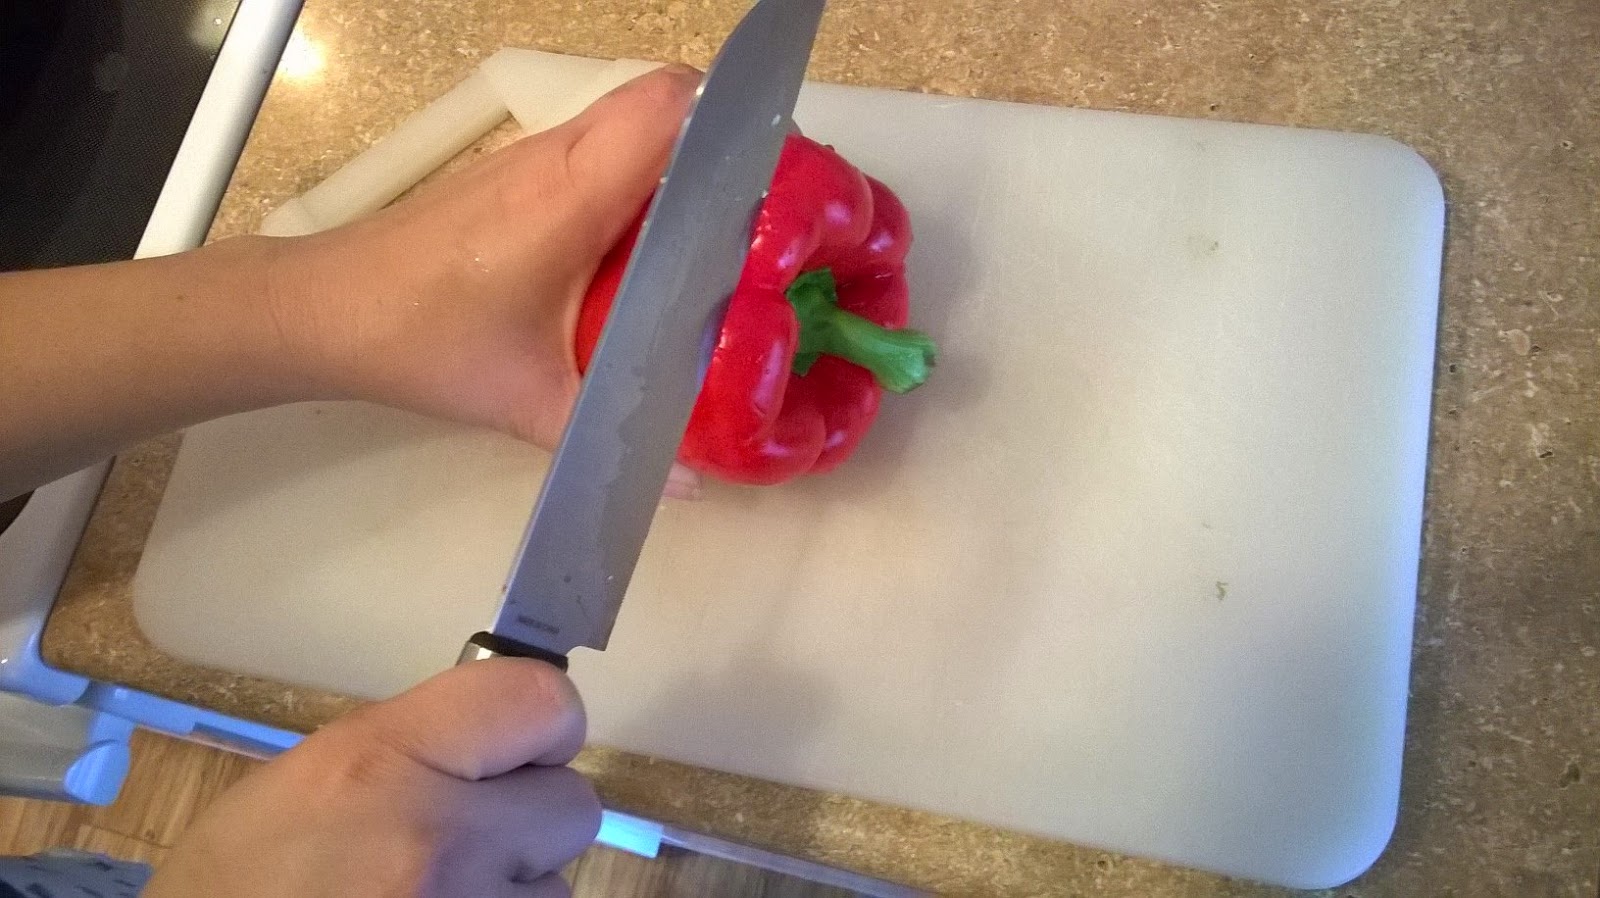
Using a sharp chopping knife and cutting board, hold the pepper with one hand and cut the top off the pepper.


Take out the membrane that is in the middle with your hands as well as the membrane on the sides of the inside.


Then can chop as needed. If you are stuffing the peppers and the bottom does not lay flat, then just cut the bottom to make it flat.


See? "Easy breezy" right? I will be posting an excellent stuffed peppers recipe in the next coming days, stayed tuned.


Saturday, October 18, 2014

Bacon and Egg Breakfast Cups

These are egg-cellent for brunch and so quick so make.The clean up is super "easy breezy" too.

You can add veggies to this or use Canadian bacon or even prosciutto ham. Another versatile recipe.


Prepare the bacon to be slighty done as it will still cook in the oven. See my "How to cook bacon." I put it in this way into the microwave; covered for 2 1/2 min.


Grease the muffin tin. Take the crusts off the bread and put into the muffin tins. Pack them in nicely. It's ok if the bread tears, just need the bread into a cup as shown.


 Add the bacon in a ring inside the bread cup. If you are adding any veggies or cheese, now is the time. Then break the eggs into the cup. If you are using large eggs there may be more egg white than you need, it's ok to throw that out. Salt and pepper to taste.


Set the oven on 350 and cook for at least 20-25 min. Longer if you like a harder egg. You will see the whites settle.


Serve with some fresh fruit and it makes a great meal for Sunday brunch or really anytime!

Enjoy!

Please let me know your comments or recipe variations. I love to hear from you!

Thursday, October 16, 2014

Easiest Garlic Bread Ever!


This takes me back to being a kid and how my mom made garlic bread, except she used real butter... Trust me does not sound like it would make good bread but it does. I made it for my fiance the other day. At first he didn't want to try it but loved it! He said it was one of the best and the mot flavorful he's had.


You can use any roll, baguette, bagels, English muffins or even white bread as I am using in this recipe.


* If you are using something that can not go in the toaster, pre-heat the over to 350 degrees, slightly wet the bread. I usually just wet my hands and just run them along both sides of the item I am putting in the oven. This allows the outside to get crispy and the inside to get warm and soft.


I put the bread in the toaster and peeled 2 heads of fresh garlic and grabbed the "I Can't Believe Its Not Butter Light".

 Once the toast is ready, take out of the toaster and rub the head of garlic on both sides of the bread. Spread butter on it. I think rubbing the raw garlic on both sides of the warm bread really brings out the flavor.

You can add Parmesan cheese or a little basil or oregano as well. Yum! and "Easy Breezy!"


Feel free to post comments, recipes, tips and to subscribe to my blog. "Mi casa es su Casa."


Tuesday, October 14, 2014

Buffalo Chicken Slider Topped w/ Coleslaw.... So Easy !!


 I buy the hot and ready chicken tenders at my grocery store usually about $5.99 lb and a small container of the store coleslaw and you can't forget the King's Hawaiian rolls. Although any bun or roll will do.

You can also buy the pre-made frozen chicken tenders which are even less then the hot and ready. They take about 10-12 min in the oven.


I use a garlic hot sauce that is hot and vinagery and delicious. Best part, it was at the 99cent store!

Put a few tenders in a bowl with sauce and toss. Put on the bun, top with coleslaw.....ta da!!

Great for tailgating, parties or a quick lunch/ dinner. Can do for under $10.

Sunday, October 12, 2014

Crockpot Beef Stew

Now that the weather is getting colder and our schedules are so busy, I love to look to the crock pot for fast, inexpensive, set it and forget it meals.

This crock pot beef stew is amazing and so "Easy Breezy". Took me 15-20 min prep time and then it cooked high 4 hrs or low up to 8.

Ingredients:

2 lbs beef stew meat
5 sm/med potato
2 cups reg (chopped) or baby carrots
1 onion
3 cloves of garlic
1 fresh jalapeno (optional)
1/2 cup flour
salt/pepper to taste
2 tablespoons olive oil


love love love these liners!! I love to cook in the crock pot but it is such a pain to clean it. These take all the pain away. Most of the time its just a quick rinse, since I just toss the liner. These babies run around $2-$3 bucks and highly recommend. Saves hours of soaking.


I put a little flour, salt and pepper into a plastic bag and add the stew meat, shake to coat lightly. I add the flour a little at a time so not to over coat.


Heat on med/high heat 2 tbsp oil ( I use olive). Add the beef and allow at least 3-4 min on each side to get a nice beautiful brown sear. This will lock in the flavors and the juiciness. 


While the beef is cooking. Clean and cut the potatoes, garlic and jalapeno (optional). I put it in because we like just a little heat. Most people put celery but I do not like it.

Put the veggies on the bottom as they take longer than proteins to cook in a crock pot.


You want a sear and the beef to get juicy, it will cook in the crock pot. Add enough beef stock to cover the meat and cook. Add pinch of salt and pepper or other seasoning you think you may like. You can even buy a .99 cent pkg of seasoning at the store if prefer.

Bullion cubes found in the seasoning isle are just concentrated cubes of stock. Comes in all kinds of flavors. You dilute it w/ water to save in buying actually stock in cans or containers.

4 hrs on high and about 8 hrs on low. Can go longer. Will be even more tender if sits a little longer. That is why the crock pot is  a great work day kitchen aid.

Even though it is tempting do not lift the lid. If you do add about 20 min of time. You know when it is done because the house smells amazing at this point.

         
             Beef stew was on sale for $3.99 lb. So the whole crock pot was right around $10!
                                                                    Enjoy!


Friday, October 10, 2014

Loaded Potatoes (Mashed)

The loaded mashed potatoes are super easy and super-fast. From start to finish these should not take you longer than 25-30 minutes, and most of that is the cooking time.

I eye all the ingredients. No need to get technical here. Feel free to make this recipe your own and add more or less of any item.

Ingredients:

6-8 small/medium potatoes
6-8 strips of bacon (see How-To “Bacon Bacon Bacon" to cook in 6 min)
1/4 cup of shredded cheese of choice (I use 2% light blended)
2 spring onion/ green onion stalks
 1 clove of garlic
2 tablespoons of butter (I use “I Can't believe It's Not Butter")
3 tablespoons of sour cream (I use fat free)
Approx. 1/4 cup milk or chicken broth (I use skim milk) this you will add in stages

I clean the potatoes well and leave the skin on. It is more nutritious this way and of course quicker But feel free to take the time to peel them if you would like. Cut into about half inch cubes. The smaller you cube them the quicker they will cook.  Add a pinch of salt and set on med high to high flame. I leave mine uncovered this way they do not boil over, but make sure to keep an eye on them. The potatoes should take about 20 minutes to cook. You know they are done when a fork goes in easily.


While the potatoes are cooking, cook the bacon (see How-To Bacon Bacon Bacon recipe to cook in 6 min), or cook it your preferred method. Let cool.

In the meantime cut the green onions and chop the garlic finely (can substitute garlic powder, but real garlic tastes best)


When the potatoes are done, drain the potatoes in a strainer or use the lid of the pot. Careful of the steam, so you do not burn yourself. And move them to a bowl.


Add all the chopped ingredients and the shredded cheese. Add the butter and sour cream. Add a little bit of milk or broth in and mash with a potato masher. Add milk as needed to get the desired creaminess. Add salt and pepper to taste.

If you do not like green onions you can add cilantro, or parsley.  Don't like bacon? Add pieces of ham or pepperoni. You can add crumbled blue cheese or feta. The sky is the limit. That is why they are called loaded.

It's a great way to use up little odds and ends in the fridge too. You can put broccoli in there. God, knows I try and sneak a veggie and/or garlic in just about everything. And I try to use the lightest versions of items such as light or fat free.

 I bought a slab of pre-cooked ribs on sale for $7.99 they took 10 min in the oven. Took a bag salad, cut a tomato, cucumber, onions and added croûtons. And dinner is served in 30 minutes. "Easy breezy".


Wednesday, October 8, 2014

How-To.....Bacon Bacon Bacon !! .... in 6 min Easiest Clean Up Ever

I can't remember who taught me this trick with bacon, I have been doing it this way as long as I can remember.... but my fiancé saw me do it this way and thought it was awesome, so I thought I would do a post. This is the fastest and cleanest way to cook crispy bacon.


On a microwave safe plate put 3 paper towels on the plate and lay the bacon on the plate side by side. Try not to overlap the bacon so it cooks evenly.


* Tip to peel the bacon easier flip it over, easier to pull it apart the way it is stacked from the back.

Put a paper towel over the bacon and microwave for 6 minutes.


When you take it out, careful the plate will be hot. Use the top paper towel to pat the extra grease off the bacon.


This will be the least greasy and the crispiest bacon you have ever had. Plus for clean-up you just throw the paper towels away and wash the plate. No greasy pan, no greasy stove. “Easy Breezy" got to love it.


Saturday, October 4, 2014

Holy.............Guacamole !!!


I was going to wait to post this but since it is the weekend, this will be great to munch on, enjoy!

This guacamole is so “easy breezy”, delicious and so good for you. It’s delicious with just chips but this can be added to so much more. I put this is wraps, on burgers and in burritos. I bring this to potlucks, parties and bbq’s and it is always a big hit. If you guys have any additional uses for guacamole please post them!


For this you will need:
4 avocados
1+ cloves of garlic
½ white onion
½ tomato
½ lime/lemon
1 sprig of cilantro (optional)
1/4 jalapeño (to taste, optional)
Salt and pepper to taste

1.     1.   Cut the avocados (see How-To Cut an Avocado).
2.     2.    Peel and chop the onion, garlic, tomato, jalapeño and sprig of cilantro.
3.     3.  Roll the lime/lemon on the counter or microwave for 20 seconds, cut in    half and take out any seeds. Squeeze a half into the mixture and mash together. I like to use a potato masher to do the job quicker but a good old fork will do the same job.
4.       4. Add salt and pepper to taste and stir again.


                                                                                                          ** If you have some of my salsa on hand (see recipe Ass Kickin Salsa) you can skip step #2, go right to squeezing the lime/lemon, stir and eat. Extra super “easy breezy”. 


When I cook I like to do few dishes at once and love when I can utilize one recipe into another.

Guacamole due to the lemon with not brown too quickly but must be eaten the same day.


Friday, October 3, 2014

Ass Kickin Salsa (Pico de Gallo)


This is one of my favorite things to make and eat and it is so healthy for you too! I bring this and my 7 Layer dip to many potlucks, parties and tailgates and people love it. It is especially good and refreshing in the summer, but I usually have a batch of this in the fridge year round.
I call it "Ass Kickin" because I love spicy food and I put enough jalapeños in it to feel the kick. This is a very versatile and variable recipe. If you do not like spicy as much as I do, start with maybe only half a jalapeño or none at all. You can always add the heat but can't take it out

Besides eating it with tortilla chips, I also put this on everything. I put it in tacos, burritos, wraps, on top of burgers or hot dogs, inside quesadillas, into scrambled eggs, on top of cottage cheese, even on a salad. And it helps to make one of the best Bloody Marys’ in town; I throw it in with all the ingredients and blend together (recipe coming soon).

I usually make a huge batch but if you cut my recipe in half it will work. All the ingredients can be adjusted to taste. Meaning if you don't like onions or cilantro, leave them out. Same with the jalapeños, if you do not like it too hot start with half or less of the jalapeño.

I use:
6-8 large tomatoes
1 large white onion
4 cloves of garlic
2 raw fresh jalapeños
2 sprigs of fresh cilantro
1 lime or lemon

I wash all my produce with a store bought produce wash to try and get as many pesticides off my fruit and veggies. But you can wash it in just light warm sink water.


Thanks to my handy dandy Ninja Chopper this recipe takes me about 15-20 minutes from start to finish to make. But it can also be chopped by hand or in a food processor.


 If you are chopping by hand be very careful when working with the jalapeños. The oils can get into your skin or under your nails and if you rub anything on your body it will burn. So make sure to wash your hands a few times with soap and warm water. I like to use plastic gloves or 2 sandwich bags on my hands when I am working with them or onions to protect my hands.


 Chop them all up and put them all in the bowl.


Cut the lime or lemon if you prefer at the end. To get a nice juicy lime or lemon, roll it on the counter under your palm with a little force a few times or put it in the microwave for about 15-20 seconds. Cut it in half, if there are any seeds, take them out. They are NOT yummy in the salsa and squeeze the juice into it, this not only adds a lot of the flavor but marinates the veggies and allows them to keep in the fridge.


I use salt very little in my kitchen but feel free to add salt to taste and mix everything together. If you do not like cilantro, leave that out as well.


It is now ready to be enjoyed. Best if you let sit an hour to allow the flavors to blend. Remix before serving. This will keep up to 2 weeks in the fridge.


Wednesday, October 1, 2014

Product-Review: Best $25 I have EVER spent..........in the kitchen


This by FAR has to be one of the best kitchen appliances that I own. Prior to this little bad boy I would chop everything by hand. I have a small kitchen so buying a huge food processor was just not going to happen, and I am so glad that I did not buy a great big one, now that I have my Ninja.

For example, it would take me hours to chop up the ingredients for my "Ass Kickin Salsa" (see Ass Kicking Salsa Recipe) because I would always make a huge batch, usually using about 8-12 large tomatoes, onions, jalepenos, etc. Now it literally takes me less than 20 minutes from start to finish to make my salsa (pico de gallo).

This processor is so small but super mighty and it fits just about anywhere. It is smaller than the coffee maker or toaster and it works like magic with the very sharp blades. It only comes in these 4 pieces, so the "easy breezy" clean up of just rinsing it under hot water or putting it in the dishwasher is a snap. I LOVE the fact that this did not com with a ton of attachments. I can have it out of the counter and set up ready to be used in less than a minute vs having to fiddle with a ton of components, same goes for the take apart and clean.


This processor only comes with one blade and that will be all you need. It is really sharp.You just cut whatever you want to chop from herbs, tomatoes, nuts, etc into pieces that fit in the cylinder and you only need to pulse a few times to get the food into tiny little chucks. For bigger chunks pulse only once or twice.

And the best part is..........? It only cost around $25! You can find one of these anywhere KMart, Target, WalMart or even online. They also have a bigger Ninja with extra components if you have the kitchen space

I would highly recommend one of these. And no, I am not getting paid any royalties for this review. I just like to share any items that will make you guys happier in the kitchen and in and out as fast as possible.

Feel free to leave any comments, questions, or recipes below.  "Mi Casa es Su Casa!"