Friday, October 10, 2014

Loaded Potatoes (Mashed)

The loaded mashed potatoes are super easy and super-fast. From start to finish these should not take you longer than 25-30 minutes, and most of that is the cooking time.

I eye all the ingredients. No need to get technical here. Feel free to make this recipe your own and add more or less of any item.

Ingredients:

6-8 small/medium potatoes
6-8 strips of bacon (see How-To “Bacon Bacon Bacon" to cook in 6 min)
1/4 cup of shredded cheese of choice (I use 2% light blended)
2 spring onion/ green onion stalks
 1 clove of garlic
2 tablespoons of butter (I use “I Can't believe It's Not Butter")
3 tablespoons of sour cream (I use fat free)
Approx. 1/4 cup milk or chicken broth (I use skim milk) this you will add in stages

I clean the potatoes well and leave the skin on. It is more nutritious this way and of course quicker But feel free to take the time to peel them if you would like. Cut into about half inch cubes. The smaller you cube them the quicker they will cook.  Add a pinch of salt and set on med high to high flame. I leave mine uncovered this way they do not boil over, but make sure to keep an eye on them. The potatoes should take about 20 minutes to cook. You know they are done when a fork goes in easily.


While the potatoes are cooking, cook the bacon (see How-To Bacon Bacon Bacon recipe to cook in 6 min), or cook it your preferred method. Let cool.

In the meantime cut the green onions and chop the garlic finely (can substitute garlic powder, but real garlic tastes best)


When the potatoes are done, drain the potatoes in a strainer or use the lid of the pot. Careful of the steam, so you do not burn yourself. And move them to a bowl.


Add all the chopped ingredients and the shredded cheese. Add the butter and sour cream. Add a little bit of milk or broth in and mash with a potato masher. Add milk as needed to get the desired creaminess. Add salt and pepper to taste.

If you do not like green onions you can add cilantro, or parsley.  Don't like bacon? Add pieces of ham or pepperoni. You can add crumbled blue cheese or feta. The sky is the limit. That is why they are called loaded.

It's a great way to use up little odds and ends in the fridge too. You can put broccoli in there. God, knows I try and sneak a veggie and/or garlic in just about everything. And I try to use the lightest versions of items such as light or fat free.

 I bought a slab of pre-cooked ribs on sale for $7.99 they took 10 min in the oven. Took a bag salad, cut a tomato, cucumber, onions and added croûtons. And dinner is served in 30 minutes. "Easy breezy".


Wednesday, October 8, 2014

How-To.....Bacon Bacon Bacon !! .... in 6 min Easiest Clean Up Ever

I can't remember who taught me this trick with bacon, I have been doing it this way as long as I can remember.... but my fiancé saw me do it this way and thought it was awesome, so I thought I would do a post. This is the fastest and cleanest way to cook crispy bacon.


On a microwave safe plate put 3 paper towels on the plate and lay the bacon on the plate side by side. Try not to overlap the bacon so it cooks evenly.


* Tip to peel the bacon easier flip it over, easier to pull it apart the way it is stacked from the back.

Put a paper towel over the bacon and microwave for 6 minutes.


When you take it out, careful the plate will be hot. Use the top paper towel to pat the extra grease off the bacon.


This will be the least greasy and the crispiest bacon you have ever had. Plus for clean-up you just throw the paper towels away and wash the plate. No greasy pan, no greasy stove. “Easy Breezy" got to love it.


Saturday, October 4, 2014

Holy.............Guacamole !!!


I was going to wait to post this but since it is the weekend, this will be great to munch on, enjoy!

This guacamole is so “easy breezy”, delicious and so good for you. It’s delicious with just chips but this can be added to so much more. I put this is wraps, on burgers and in burritos. I bring this to potlucks, parties and bbq’s and it is always a big hit. If you guys have any additional uses for guacamole please post them!


For this you will need:
4 avocados
1+ cloves of garlic
½ white onion
½ tomato
½ lime/lemon
1 sprig of cilantro (optional)
1/4 jalapeño (to taste, optional)
Salt and pepper to taste

1.     1.   Cut the avocados (see How-To Cut an Avocado).
2.     2.    Peel and chop the onion, garlic, tomato, jalapeño and sprig of cilantro.
3.     3.  Roll the lime/lemon on the counter or microwave for 20 seconds, cut in    half and take out any seeds. Squeeze a half into the mixture and mash together. I like to use a potato masher to do the job quicker but a good old fork will do the same job.
4.       4. Add salt and pepper to taste and stir again.


                                                                                                          ** If you have some of my salsa on hand (see recipe Ass Kickin Salsa) you can skip step #2, go right to squeezing the lime/lemon, stir and eat. Extra super “easy breezy”. 


When I cook I like to do few dishes at once and love when I can utilize one recipe into another.

Guacamole due to the lemon with not brown too quickly but must be eaten the same day.


Friday, October 3, 2014

Ass Kickin Salsa (Pico de Gallo)


This is one of my favorite things to make and eat and it is so healthy for you too! I bring this and my 7 Layer dip to many potlucks, parties and tailgates and people love it. It is especially good and refreshing in the summer, but I usually have a batch of this in the fridge year round.
I call it "Ass Kickin" because I love spicy food and I put enough jalapeños in it to feel the kick. This is a very versatile and variable recipe. If you do not like spicy as much as I do, start with maybe only half a jalapeño or none at all. You can always add the heat but can't take it out

Besides eating it with tortilla chips, I also put this on everything. I put it in tacos, burritos, wraps, on top of burgers or hot dogs, inside quesadillas, into scrambled eggs, on top of cottage cheese, even on a salad. And it helps to make one of the best Bloody Marys’ in town; I throw it in with all the ingredients and blend together (recipe coming soon).

I usually make a huge batch but if you cut my recipe in half it will work. All the ingredients can be adjusted to taste. Meaning if you don't like onions or cilantro, leave them out. Same with the jalapeños, if you do not like it too hot start with half or less of the jalapeño.

I use:
6-8 large tomatoes
1 large white onion
4 cloves of garlic
2 raw fresh jalapeños
2 sprigs of fresh cilantro
1 lime or lemon

I wash all my produce with a store bought produce wash to try and get as many pesticides off my fruit and veggies. But you can wash it in just light warm sink water.


Thanks to my handy dandy Ninja Chopper this recipe takes me about 15-20 minutes from start to finish to make. But it can also be chopped by hand or in a food processor.


 If you are chopping by hand be very careful when working with the jalapeños. The oils can get into your skin or under your nails and if you rub anything on your body it will burn. So make sure to wash your hands a few times with soap and warm water. I like to use plastic gloves or 2 sandwich bags on my hands when I am working with them or onions to protect my hands.


 Chop them all up and put them all in the bowl.


Cut the lime or lemon if you prefer at the end. To get a nice juicy lime or lemon, roll it on the counter under your palm with a little force a few times or put it in the microwave for about 15-20 seconds. Cut it in half, if there are any seeds, take them out. They are NOT yummy in the salsa and squeeze the juice into it, this not only adds a lot of the flavor but marinates the veggies and allows them to keep in the fridge.


I use salt very little in my kitchen but feel free to add salt to taste and mix everything together. If you do not like cilantro, leave that out as well.


It is now ready to be enjoyed. Best if you let sit an hour to allow the flavors to blend. Remix before serving. This will keep up to 2 weeks in the fridge.


Wednesday, October 1, 2014

Product-Review: Best $25 I have EVER spent..........in the kitchen


This by FAR has to be one of the best kitchen appliances that I own. Prior to this little bad boy I would chop everything by hand. I have a small kitchen so buying a huge food processor was just not going to happen, and I am so glad that I did not buy a great big one, now that I have my Ninja.

For example, it would take me hours to chop up the ingredients for my "Ass Kickin Salsa" (see Ass Kicking Salsa Recipe) because I would always make a huge batch, usually using about 8-12 large tomatoes, onions, jalepenos, etc. Now it literally takes me less than 20 minutes from start to finish to make my salsa (pico de gallo).

This processor is so small but super mighty and it fits just about anywhere. It is smaller than the coffee maker or toaster and it works like magic with the very sharp blades. It only comes in these 4 pieces, so the "easy breezy" clean up of just rinsing it under hot water or putting it in the dishwasher is a snap. I LOVE the fact that this did not com with a ton of attachments. I can have it out of the counter and set up ready to be used in less than a minute vs having to fiddle with a ton of components, same goes for the take apart and clean.


This processor only comes with one blade and that will be all you need. It is really sharp.You just cut whatever you want to chop from herbs, tomatoes, nuts, etc into pieces that fit in the cylinder and you only need to pulse a few times to get the food into tiny little chucks. For bigger chunks pulse only once or twice.

And the best part is..........? It only cost around $25! You can find one of these anywhere KMart, Target, WalMart or even online. They also have a bigger Ninja with extra components if you have the kitchen space

I would highly recommend one of these. And no, I am not getting paid any royalties for this review. I just like to share any items that will make you guys happier in the kitchen and in and out as fast as possible.

Feel free to leave any comments, questions, or recipes below.  "Mi Casa es Su Casa!"

Tuesday, September 30, 2014

How-To......... Slice an Avocado


Seeing the way my fiance cut into an avocado the other day... I thought it may be a good idea to do this demonstration as to how to properly cut an avocado.


I now prefer to use Hass brand avocados. I have tried to buy the cheap ones but for some reason, the Hass taste better and are meatier than others on the market. They are pricier, but in this case you "do get what you pay for".


 Hold the avocado in the palm of your hand Using a good chopping knife, slice into it lengthwise and carry the knife through and around the whole avocado till you have 2 halves.


You use a heavy chopping knife because now you use the butt of the blade to dig into the pit of the avocado. You do not have to hit the pit hard, and be careful.


Twist the knife, as if turning a key in a lock and the pit should come loose, as pictured.      


Carefully!!!  Cut the avocado length wise. Make sure at this point the avocado is NOT laying flat in your palm. Hold it more by the finger tips so that if you cut the skin; you will not cut your hand.


Now cut in the other direction to make cubes the size you would like.


Take a spoon and scoop. Take the spoon and go to the bottom of the peel and scoop out the inside of the avocado.


Remember avocado oxidizes quickly, meaning it browns. To stop it from doing so squeeze some lemon or lime juice on it.


This very healthy treat is now ready to be eaten just like this with a pinch of salt or added to just about anything. I use avocado for guacamole, in sandwiches and wraps, on top of burgers and in salads or stuffed tomatos.

 Delish!

Sunday, September 28, 2014

For the love of Cilantro Dip......


Well you guys already know I love love love cilantro.... so here is another great recipe I put this on everything!!


You can use this as a dip, sauce to put on tacos, fish, chicken; I even will put a little milk into it and pour on a salad as a dressing. I use either fat-free or light sour cream too, so no guilt and it is so healthy and yummy.


Wash and cut the stems off the cilantro. Add a few cloves of garlic to taste, into a food processor or chop by hand.

You can also add salt and pepper, ( I like to keep a low salt kitchen.)


It will look like this once chopped. I like it a little chuncky.


I add it right into the sour cream container and mix. Best if you let it stand in the fridge for at least an hour to allow the flavors to blend. Stir again before serving.

**You can also skip this part and add right to the sour cream if you have any of the Garlic Cilantro Pesto. Just add as much as you like and stir(see recipe).**


This will keep in the fridge for at least 2 weeks or the expiration date on the sour cream; whichever comes first.


Garlic Cilantro Pesto


On our last trip to Costa Rica over lunch with a friend, the,waiter brought this over to  the table as a topping for our steak and it was delicious.  This is my version of what I tasted.

I love love love cilantro! I am always looking for new uses for it. I hate buying a bunch and have any to go to waste.


Here is a great "easy breezy" recipe for a pesto or aioli.


It is great on steaks, chicken, fish I also use it as my base to make my garlic cilantro dip (see recipe), you can even put it on a pasta and toss like a traditional pesto.

The ninja chopper  product review coming soon) makes this a 5 min process! So healthy and flavorful.


Wash and cut the stems off the cilantro, put a bunch of cilantro in the food processor or you can chop by hand if you prefer, and add a few cloves of garlic as desired and 1/2 cup of olive oil and chop.


Chop to desired consistency. I like it a little chunky.


Put in a plastic storage container and this will last at least a good week.

                          Enjoy!


Please feel free to post any comments or questions.

Are you ready for some football? ....Tailgate at my house..... On The Menu: Buffalo Wild Wings and Homemade Home Cut Garlic Fries.


Football is big in our home. My fiancé is a huge Denver Broncos fan (and if you do not like them, sorry in advance). Every time the Broncos play it is like having a tailgate party at my house, so I like to come up with hearty man food that is quick, easy to eat and is easy to clean up.


This past Sunday, besides all the regular munchies of crackers, cheese, chips and dips; I made these great chicken wings in several different flavors and homemade, home cut fries that I will share with you below. And most importantly it was, “Easy Breezy", just the way I like it! (I made a side salad as well.)They were a big hit. I served them with disposable plates and plenty of napkins, and it was an easy clean up too!


I bought a 4lb bag of chicken wings at the grocery store ($7.99).  Wings come in a variety of sizes, I have seen bags as small as  2.5lb's all the way up to a 10lb bag. A bag of regular Idaho brown potatoes ($1.99 for 10lb bag). You can make as little or many as you like.


 For those of you that are fortunate enough to have a Buffalo Wild Wings Restaurant (BW3), did you know you can buy their sauces in a  12 fl oz bottle for around $5-$6? And for those of you that do not have a BW3 Restaurant in your area, don't fret there are plenty of other options of flavors out there, you probably have a few in your fridge or cupboards right now!

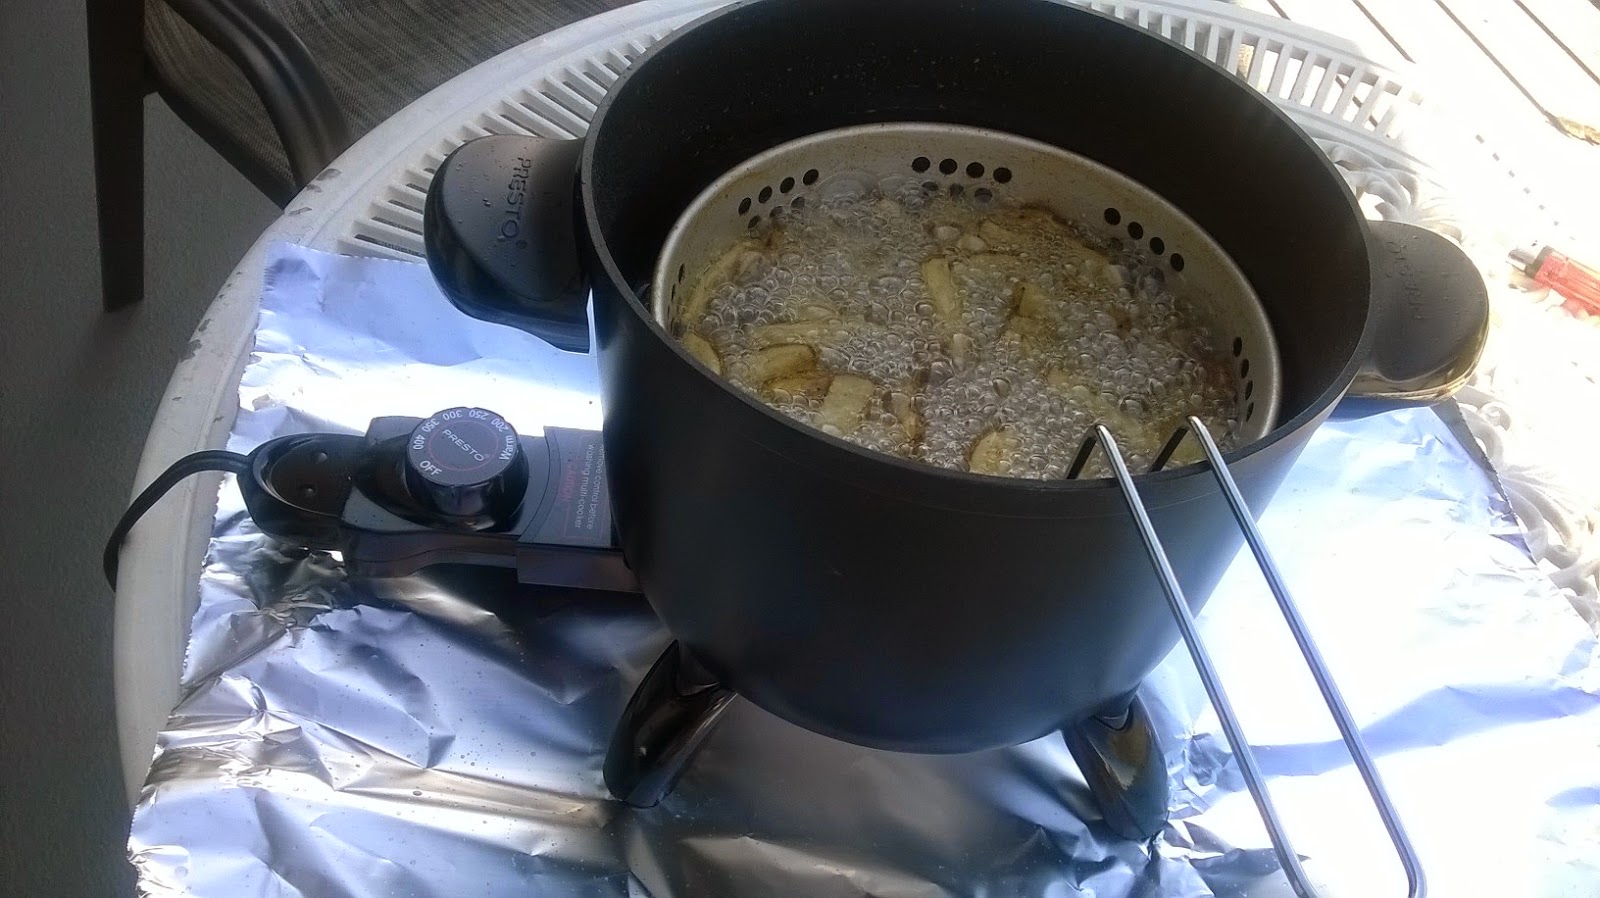
I set up my deep fryer. Poured the oil in to the line that is marked and turned it on to heat. You do not need a deep fryer, you can use a deep pan on the stove as well. As long as it is deep enough that when you put oil and food in that it reaches no more than 2/3 to the top in case the oil rises.


I cut up the potatoes into fries with a mandolin, but you can cut them by hand on a cutting board. We LOVE garlic in this house, so I minced an entire head of garlic, put a little salt and olive oil  on it and minced again to make it into a light paste and set aside 

I dried off the wings and put them on paper towels. If they are wet the grease can spatter.
I seasoned the wings with salt, pepper and garlic powder and let them site for a little bit to marinate.
Then I put enough wings in the deep fryer so that not to crowd them, about 8 per round, so that they cook evenly for 12 minutes. the interior temperature has to reach 165 degrees inside.


Once the wings were done I put the potatoes in the fryer. They also took 12 minutes. If you like them crisper, leave them in a little longer. Toss them in the garlic mixture as soon as they are out of the oil so that the garlic adheres to the fries.


I put about 6 wings into the bowl with the choice of sauce and mixed them together. If you do not have a BW3, you can use hot sauce, bbq sauce, teriyaki, any flavor of sauce that you like. Or you can enjoy them plain.


Accompany with some blue cheese and ranch dressing and enjoy!
                 

Thursday, September 25, 2014

From one food lover to another.......

Welcome! I am really excited about taking this journey with you in writing this food Blog.

What makes me the expert? I do not have any formal culinary skills, nor do I claim to be an expert. But I love all things food. I love to cook and eat well ,try new recipes and learn.. I hope you will take this culinary journey with me.

In this journey I plan to make all varieties of meals from classic comfort, healthy and fit to the fancy schmancy and share the best recipes with you.

I will also occasionally review certain kitchen products, cooking sites, books, health benefits of certain foods, even a local  (Las Vegas) restaurant review or two. All things food.

I try to keep my recipes light and low sodium but you will see some guilty pleasures here too.

Feel free to post your own recipes, pics and comment. "Mi casa es Su casa."

 Welcome and Bon Appetit  : )