Tuesday, September 30, 2014

How-To......... Slice an Avocado


Seeing the way my fiance cut into an avocado the other day... I thought it may be a good idea to do this demonstration as to how to properly cut an avocado.


I now prefer to use Hass brand avocados. I have tried to buy the cheap ones but for some reason, the Hass taste better and are meatier than others on the market. They are pricier, but in this case you "do get what you pay for".


 Hold the avocado in the palm of your hand Using a good chopping knife, slice into it lengthwise and carry the knife through and around the whole avocado till you have 2 halves.


You use a heavy chopping knife because now you use the butt of the blade to dig into the pit of the avocado. You do not have to hit the pit hard, and be careful.


Twist the knife, as if turning a key in a lock and the pit should come loose, as pictured.      


Carefully!!!  Cut the avocado length wise. Make sure at this point the avocado is NOT laying flat in your palm. Hold it more by the finger tips so that if you cut the skin; you will not cut your hand.


Now cut in the other direction to make cubes the size you would like.


Take a spoon and scoop. Take the spoon and go to the bottom of the peel and scoop out the inside of the avocado.


Remember avocado oxidizes quickly, meaning it browns. To stop it from doing so squeeze some lemon or lime juice on it.


This very healthy treat is now ready to be eaten just like this with a pinch of salt or added to just about anything. I use avocado for guacamole, in sandwiches and wraps, on top of burgers and in salads or stuffed tomatos.

 Delish!

Sunday, September 28, 2014

For the love of Cilantro Dip......


Well you guys already know I love love love cilantro.... so here is another great recipe I put this on everything!!


You can use this as a dip, sauce to put on tacos, fish, chicken; I even will put a little milk into it and pour on a salad as a dressing. I use either fat-free or light sour cream too, so no guilt and it is so healthy and yummy.


Wash and cut the stems off the cilantro. Add a few cloves of garlic to taste, into a food processor or chop by hand.

You can also add salt and pepper, ( I like to keep a low salt kitchen.)


It will look like this once chopped. I like it a little chuncky.


I add it right into the sour cream container and mix. Best if you let it stand in the fridge for at least an hour to allow the flavors to blend. Stir again before serving.

**You can also skip this part and add right to the sour cream if you have any of the Garlic Cilantro Pesto. Just add as much as you like and stir(see recipe).**


This will keep in the fridge for at least 2 weeks or the expiration date on the sour cream; whichever comes first.


Garlic Cilantro Pesto


On our last trip to Costa Rica over lunch with a friend, the,waiter brought this over to  the table as a topping for our steak and it was delicious.  This is my version of what I tasted.

I love love love cilantro! I am always looking for new uses for it. I hate buying a bunch and have any to go to waste.


Here is a great "easy breezy" recipe for a pesto or aioli.


It is great on steaks, chicken, fish I also use it as my base to make my garlic cilantro dip (see recipe), you can even put it on a pasta and toss like a traditional pesto.

The ninja chopper  product review coming soon) makes this a 5 min process! So healthy and flavorful.


Wash and cut the stems off the cilantro, put a bunch of cilantro in the food processor or you can chop by hand if you prefer, and add a few cloves of garlic as desired and 1/2 cup of olive oil and chop.


Chop to desired consistency. I like it a little chunky.


Put in a plastic storage container and this will last at least a good week.

                          Enjoy!


Please feel free to post any comments or questions.

Are you ready for some football? ....Tailgate at my house..... On The Menu: Buffalo Wild Wings and Homemade Home Cut Garlic Fries.


Football is big in our home. My fiancé is a huge Denver Broncos fan (and if you do not like them, sorry in advance). Every time the Broncos play it is like having a tailgate party at my house, so I like to come up with hearty man food that is quick, easy to eat and is easy to clean up.


This past Sunday, besides all the regular munchies of crackers, cheese, chips and dips; I made these great chicken wings in several different flavors and homemade, home cut fries that I will share with you below. And most importantly it was, “Easy Breezy", just the way I like it! (I made a side salad as well.)They were a big hit. I served them with disposable plates and plenty of napkins, and it was an easy clean up too!


I bought a 4lb bag of chicken wings at the grocery store ($7.99).  Wings come in a variety of sizes, I have seen bags as small as  2.5lb's all the way up to a 10lb bag. A bag of regular Idaho brown potatoes ($1.99 for 10lb bag). You can make as little or many as you like.


 For those of you that are fortunate enough to have a Buffalo Wild Wings Restaurant (BW3), did you know you can buy their sauces in a  12 fl oz bottle for around $5-$6? And for those of you that do not have a BW3 Restaurant in your area, don't fret there are plenty of other options of flavors out there, you probably have a few in your fridge or cupboards right now!

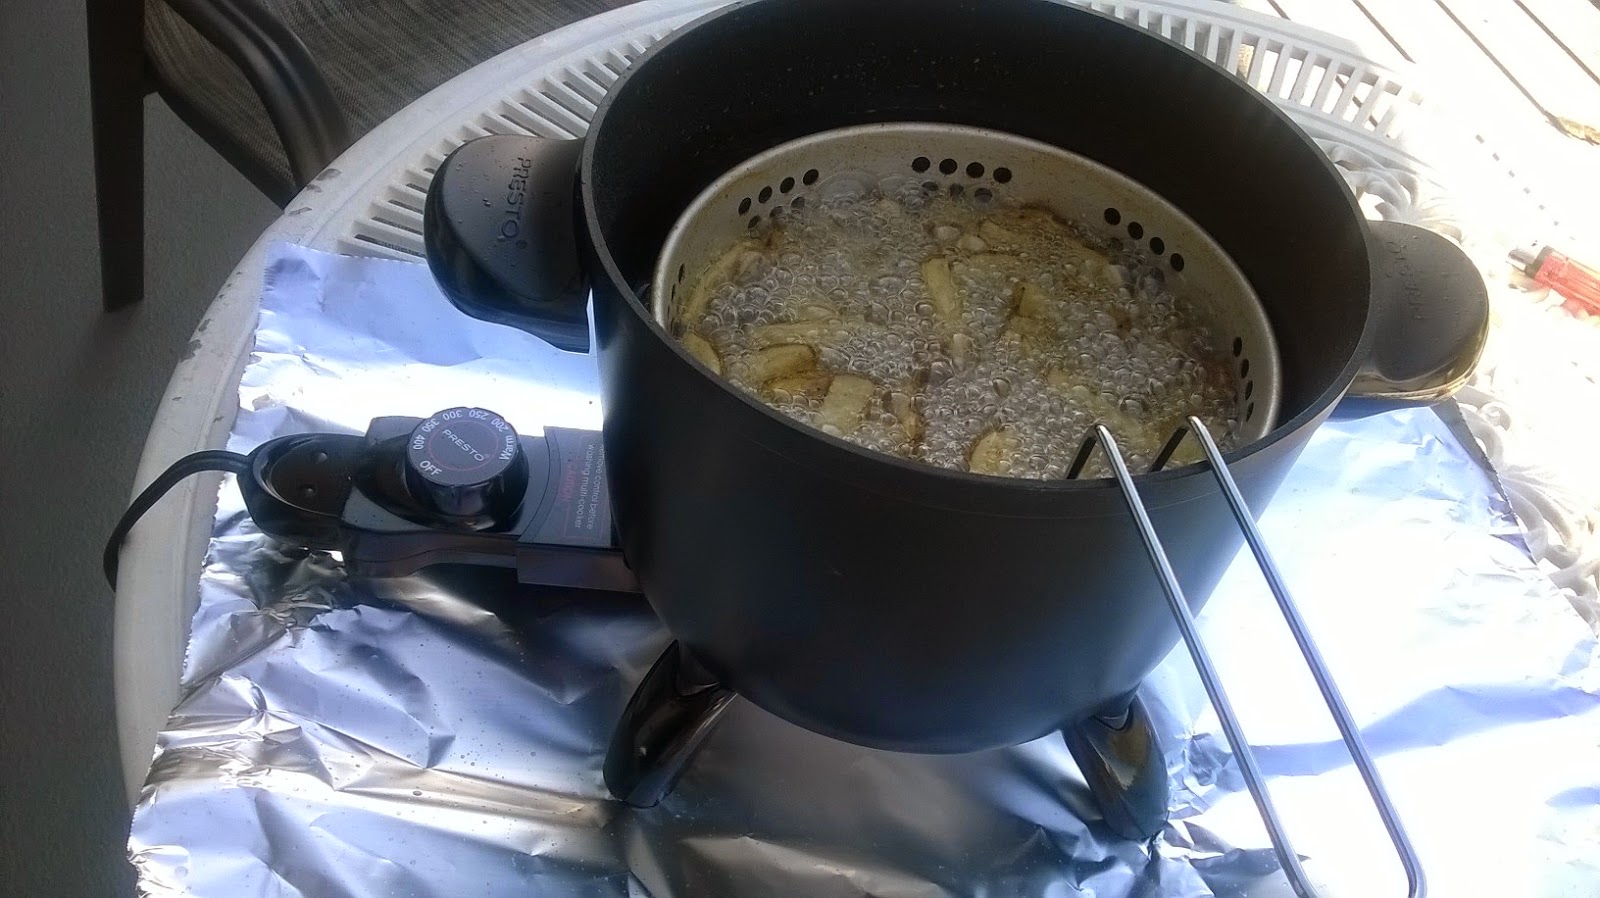
I set up my deep fryer. Poured the oil in to the line that is marked and turned it on to heat. You do not need a deep fryer, you can use a deep pan on the stove as well. As long as it is deep enough that when you put oil and food in that it reaches no more than 2/3 to the top in case the oil rises.


I cut up the potatoes into fries with a mandolin, but you can cut them by hand on a cutting board. We LOVE garlic in this house, so I minced an entire head of garlic, put a little salt and olive oil  on it and minced again to make it into a light paste and set aside 

I dried off the wings and put them on paper towels. If they are wet the grease can spatter.
I seasoned the wings with salt, pepper and garlic powder and let them site for a little bit to marinate.
Then I put enough wings in the deep fryer so that not to crowd them, about 8 per round, so that they cook evenly for 12 minutes. the interior temperature has to reach 165 degrees inside.


Once the wings were done I put the potatoes in the fryer. They also took 12 minutes. If you like them crisper, leave them in a little longer. Toss them in the garlic mixture as soon as they are out of the oil so that the garlic adheres to the fries.


I put about 6 wings into the bowl with the choice of sauce and mixed them together. If you do not have a BW3, you can use hot sauce, bbq sauce, teriyaki, any flavor of sauce that you like. Or you can enjoy them plain.


Accompany with some blue cheese and ranch dressing and enjoy!
                 

Thursday, September 25, 2014

From one food lover to another.......

Welcome! I am really excited about taking this journey with you in writing this food Blog.

What makes me the expert? I do not have any formal culinary skills, nor do I claim to be an expert. But I love all things food. I love to cook and eat well ,try new recipes and learn.. I hope you will take this culinary journey with me.

In this journey I plan to make all varieties of meals from classic comfort, healthy and fit to the fancy schmancy and share the best recipes with you.

I will also occasionally review certain kitchen products, cooking sites, books, health benefits of certain foods, even a local  (Las Vegas) restaurant review or two. All things food.

I try to keep my recipes light and low sodium but you will see some guilty pleasures here too.

Feel free to post your own recipes, pics and comment. "Mi casa es Su casa."

 Welcome and Bon Appetit  : )